Gold Coast pool planning
Pool Coping and Waterline Tile Coordination | Gold Coast
Replacing pool coping or waterline tiles is a coordination project as well as a colour choice. The pool edge meets the interior finish on one side and the surrounding landscape on the other. A decision about thickness, profile or tile layout can affect how those adjoining surfaces are finished. For a Gold Coast pool renovation, agree the interfaces before ordering materials. This guide helps you organise the details with the pool contractor, tiler and landscaper. It does not provide a waterproofing specification or instructions for removing, bonding or repairing pool finishes.
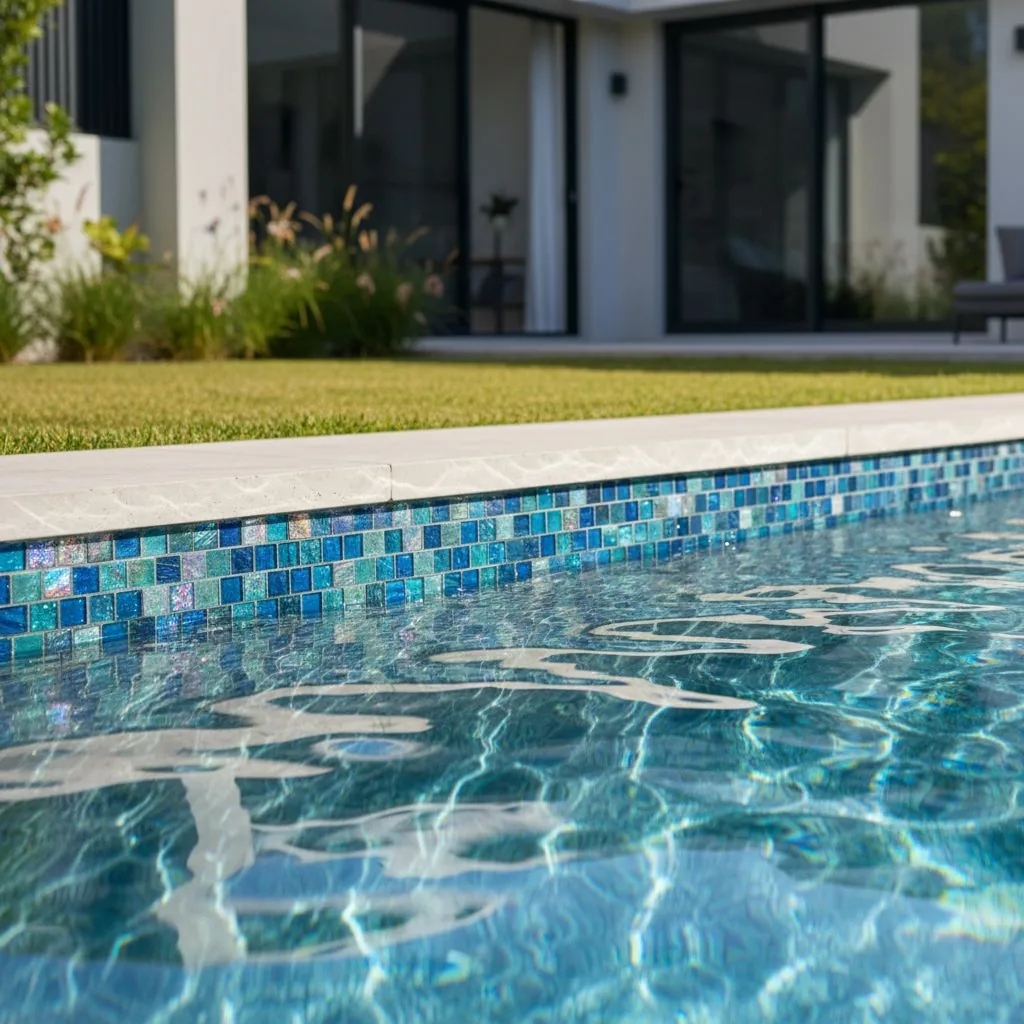
Identify which parts of the edge are changing
Start with a marked photograph or sketch that separates coping, waterline tile, interior finish and surrounding paving. Coping is the finished cap at the pool edge; the waterline band sits on the pool wall near the normal water surface. The surround is the adjoining walking area. These may appear to be a continuous design, but the renovation scope needs to identify them separately. Replacing one does not automatically include preparation or repair of every adjoining surface.
Mark retained materials clearly. If the surrounding paving stays, explain whether you expect a close visual match, a deliberately contrasting border or a wider transition strip. If waterline tiles remain, ask how coping removal and replacement will be coordinated to avoid treating them as expendable. The contractor should explain the practical limits of retaining finishes around the work. Do not assume a neat cut line on a concept drawing is achievable without assessing the existing construction.
Photograph corners, skimmers, changes in level and other interruptions along the edge from safe standing positions. Those details often need a different treatment from a straight run. Add notes about where the current finish bothers you: an awkward corner, a patchwork appearance or a difficult junction with a step. Keep observed condition separate from diagnosis. A visible crack or loose-looking tile needs assessment; its appearance alone does not establish the cause.
Choose a coordinated palette using real samples
Compare the proposed coping and waterline tile together with the finish that will remain. A small sample viewed indoors can look different beside blue water, pale paving and planting. Request actual product samples and identification labels so the final order can be checked against the selection. Include grout and any visible sealant in the comparison. Those narrow bands can change the overall appearance more than expected, particularly around a small-format mosaic.
Look at samples in ordinary outdoor light from a comfortable, dry position. You can compare colour, pattern and edge appearance without testing hot surfaces by touch or walking on loose samples. Ask the supplier about variation between pieces, surface finish and the product's intended use. Do not assume that all stone sold under the same general name looks or performs the same. The exact supplied product and finish matter more than a broad material label.
Set a realistic matching brief for an older surround. A new product may be different even when described with the same colour name as the existing paving. Decide whether the project depends on a close match or whether a controlled contrast would be acceptable. Ask to see the proposed combination before ordering the full quantity. The useful outcome is a recorded selection, not a verbal description such as light cream stone that could refer to several products.
Review profiles, thickness and the visible edge
Coping profile affects the appearance of the edge and how it meets nearby finishes. A rounded, square or rebated profile should be shown in a section drawing, not only in a product photograph. Ask the contractor to show the proposed relationship to the pool wall, waterline band and existing surround. A deeper-looking edge may alter what remains visible below it, while a different thickness can create work at the adjoining paving transition.
Discuss corners and curved sections before assuming a straight-edge sample represents the whole project. Ask how corners will be formed, where cut pieces appear and how any irregular existing geometry is accommodated. A pool that looks rectangular may not have identical dimensions along every edge. The tiler needs an actual set-out plan rather than an instruction to make every joint line up. Request an explanation of which alignments take priority where perfect alignment is not possible.
Small details should be resolved with the same material schedule. Skimmer access, removable lids and penetrations must remain usable after the edge is finished. Ask how the chosen coping affects those details and whether the relevant fittings are retained or replaced. Do not accept a rendered image that hides every interruption as the only record of the agreed result. A practical drawing with labelled junctions is more useful for reviewing the finished work.
Make the waterline tile layout deliberate
The waterline band should be set out in relation to the intended operating water level and the coping detail. Ask the contractor how much of the tile will normally be visible and how changes in water level affect the appearance. A photograph taken with an unusually high water level may conceal a band that will be more prominent in daily use. Avoid choosing a tile based solely on a submerged sample if part of that tile will usually sit above the water.
Tile format influences how corners, curves and fittings are resolved. A small mosaic can accommodate some shapes differently from a larger format, but that does not make it automatically suitable for every substrate or installation. Ask the tiler to confirm the selected product is intended for the proposed pool application and that its backing and installation system are appropriate. The product name, finish and manufacturer instructions should be recorded, not just the colour and sheet size.
Review the proposed starting point and cut locations on the actual pool. Ask where narrow pieces may occur and whether the most visible wall should receive priority in the set-out. This is especially helpful when a long waterline band runs parallel to paving joints that cannot be changed. The aim is a consistent, intentional arrangement, not an impossible demand that every old and new joint coincide around the entire perimeter.
Keep preparation and movement details in the scope
The visible tile or stone is only part of the installed system. Ask the contractor to describe the assessment and preparation beneath it, including how unsuitable existing material is identified and what happens if removal reveals a problem. A scope that says replace tiles can conceal a large difference between bonding over an existing surface and removing it for an assessed replacement system. You need to know which approach is proposed and the basis for it.
Movement joints should be treated as designed details, not unwanted lines that can simply disappear under new finishes. Ask the installer to identify existing joints and explain how the proposed work coordinates with them. ARDEX Australia publishes installation guidance for its systems; the contractor should use current instructions for the actual selected products and application. This is a reason to request a complete specification, not to copy a joint spacing or adhesive choice from a general article.
Keep responsibility for adjoining work explicit. If the pool contractor prepares the shell, a tiler installs the finish and a landscaper replaces surrounding paving, identify who coordinates their interfaces. The project needs agreement about where each trade starts and finishes, including any waterproofing and movement accommodation. The owner should not be left to reconcile conflicting product advice after materials have arrived. Request that unresolved compatibility questions are answered before installation proceeds.
Coordinate the surrounding walking area
A coping change may alter the relationship to existing paving, drainage features or adjacent doors. Ask the project team to show the finished levels and transitions together. Do not assume that matching the top of a new coping piece to an old paver resolves the whole junction. The installer needs to assess the existing base, proposed material thickness and water-management details for the site. Your task is to identify the routes people use and the areas you expect to retain.
If the barrier is close to the edge, make its relationship to the renovation visible in the design. Do not move posts, change ground levels around a barrier or remove a gate to help the work proceed without an agreed professional plan. Pool safety requirements remain a separate assessment. Refer the project team to the current QBCC homeowner guidance when clarifying responsibilities for the surrounding arrangement. This article does not determine whether a barrier is compliant.
Illustrative example: an owner wants to replace an old rounded coping with a square profile while retaining most of the patio. The attractive sample is thicker than the existing edge, and a skimmer lid interrupts the most visible run. Before ordering, the contractor develops a transition detail and a lid treatment. The final selection may remain the same, but the owner is now comparing a complete installed detail instead of an isolated piece of stone.
Record the finish schedule and review points
A useful finish schedule names the exact coping, tile, grout and other visible components, along with their intended locations. Add photographs of the approved samples and note whether natural variation is expected. Ask what spare pieces should be retained and how they should be labelled. Unidentified leftovers are much less useful than a small stock connected to a product code, batch reference and installation location. Confirm storage arrangements rather than leaving loose materials beside the pool.
Agree when you will review the set-out and sample combination before full installation. The review should happen while meaningful changes are still possible, without interrupting critical installation work. Ask the contractor which details need your decision and which are technical responsibilities for the installer. Keep a written record of approved changes so the final appearance is not judged against an earlier concept that was superseded during preparation.
At completion, collect care instructions for the actual finish system. Avoid a generic promise that a material is maintenance free or can be cleaned with any household product. Ask which cleaning methods are permitted, which products to avoid and who to contact if a joint or tile changes. Link those instructions to the pool handover record. For broader project scope, use the pool renovation service page; for the interior surface choice, the existing pebble and quartz comparison addresses a different part of the decision.
Your planning checklist
Organise finish decisions before ordering. The checklist tracks your selection records and questions; it does not verify substrate condition or installation compatibility.
Check each finish record you have obtained. These ticks do not place an order or send an enquiry.
Choose an item to track your preparation.